Your Tech Stack Questions Answered!

One of the questions I get asked the most – is what tech platform should I build my site on! Since more and more businesses are going online there are more options for your website. Keeping up with the latest and greatest tool can be a bit overwhelming. After spending all day with yours eyes glued to your screen, scouring and reading multiple list of reviews, your bound to be fed up and end up picking the most basic and cheapest option.

I understand exactly where you’re right at, that’s why I’ve done this part for you! After more than 10 years in web automation here is a run down of the basics of what you need and our recommended platforms! 

Your domain is the name of your website. For example, www.yoursite.com is the name of your domain. A domain costs about $12-15 per year depending on where you register it. 

Your hosting is where you will store your files. It is like a virtual file cabinet for your website, images, videos. There are different plans based on how many sites you have. 

A few platforms to register your domain are:

GoDaddy

Ionis by 1&1

A few platforms we like for hosting are:

Ionis by 1&1

Liquid Web

WordPress is our platform of choice to build a website. It has the most flexibility and there are a lot of plugins available to make it do anything you want. 

Go to wordpress.org to grab the open source files that you can download and use to build your site.

WordPress is like the file cabinet. But you still need to organize the layout and design. You do this with a theme.

The theme we like and use right now is called “Elementor”. You can check it out here.

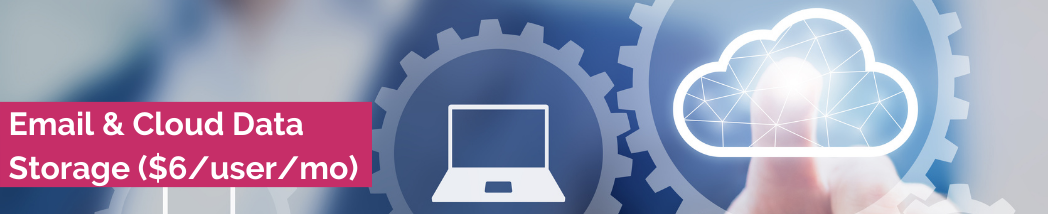
Your email platform is sometimes included with your hosting plan. This is the ability to send emails from your domain name ie [email protected]

We like and use GSuite Apps to handle our email. This has a little higher cost (about $6/user/mo), but since it also includes the ability to create and share documents on the cloud, we find it’s worth it. 

What this means is that you can use your own domain with gmail to send and receive emails as opposed to having to login to your hosting account or having your hosting account forward your emails to a personal gmail for example so you can access them. 

Having all documents on the cloud is also a huge advantage. Our team doesn’t have to worry about having 5 different versions of the same doc as we can collaborate on one doc and always see the most updated version in the cloud. 

Email marketing is a tool that you can use to create different lists of emails and send a series of automated emails to your different lists. The prices for these tools range from $15-$199 per month

The one we use and recommend is Infusionsoft as it has Email Marketing, a CRM, and a Shopping Cart in one. 

Other tools that work well are:

Active Campaign

MailChimp

Aweber

All three work very well. Active Campaign is a little more similar to Infusionsoft in that it has built in functionality to build campaigns in a visual layout. Mailchimp and Aweber are great if you are just getting started.

To take payments online you need 3 things. 

  • Merchant Account
  • Gateway
  • Shopping Cart

You can either set up all 3 things separately or you can use tools that combine two or three of them together. Some examples of 3 in 1 are: Paypal and Stripe. Both paypal and stripe allow you to sign up with just their service and they provide you with buttons that you can put on your site so you can sell your products or services. They do charge a commission of around 3% per transaction as well as a transaction fee. 

The most common method is to get all 3 services individually, like the following. 

Merchant Account ($15/mo + 3%)

A merchant account is the ability to process credit card transactions. You can sign up for a merchant account directly with your bank. Be sure to request a “Cart Not Present” account! This is usually the cheapest way to process credit card transactions online. 

Gateway ($20/mo)

A gateway is how you connect your merchant account to your shopping cart. The most common one is Authorize.net and when you set up your merchant account with your bank you can request an authorize.net account as well. 

Shopping Cart (Varies)

A shopping cart is how you collect payments online. It is the tool you use to create order forms so that your customers can put in their credit card information online in a secure place.  We use Infusionsoft as our shopping cart. Other shopping carts are also available. Some examples are SamCart, ClickFunnels, Kajabi. Before jumping out and getting a shopping cart, you will want to make sure it is compatible with your landing page builder (and many times it is included with your landing page builder.) 

Landing pages are pages that are built to either capture leads, or sell your products or services. Since the look and feel of landing pages usually varies from the main site, these landing pages are sometimes built with landing page builders. 

Some of the one’s we use are:

LeadPages

ClickFunnels

ThriveThemes

We usually install these on a subdomain of the main site. For example:

  • Go.yoursite.com
  • Start.yoursite.com
  • Launch.yoursite.com

The words “go”, “start”, “launch” are examples of subdomains. 

If you are selling a course then you will need a members area to deliver your course content. An LMS stands for a Learning Management Software. 

If you use Infusionsoft like we do, then Memberium is an easy to use membership software that you can set up on a subdomain of your site. For example: courses.yoursite.com or members.yoursite.com. 

Another popular one that we recommend is LearnDashLearndash can be used in conjunction with Memberium as well. 

Learndash allows you to organize the content in your members area and also to roll out access to the content on a weekly or monthly basis. Another membership tool is Kajabi.

Live Webinars

For live webinars, we use Zoom. Most of us today have an account with Zoom for meetings. If you are going to hold a webinar, you can upgrade to have the functionality of a webinar. I love how they allow you to just upgrade to get webinars for one month and automatically cancel it for you after 30 days. 

There is also a built-in functionality with Zoom that allows you to live stream directly to Facebook. This allows your audience to choose how they want to attend a live webinar.  It can also allow you to have more people participate in a live webinar if you are at your capacity with your Zoom account. One of our clients recently used a combo of Zoom and FB Live to have a webinar with 16,000 attendees!

Automated Webinars

Once you have a few live webinars you are going to want to create what is called an “evergreen” campaign where people can watch your webinars at will. Our software of choice is EverWebinar. We’ve tried many and despite the limitations, still find that it meets most of our expectations. One of the cool things that you can do is to tag contacts based on which stage of the webinar they got to. For example, you can tag them based on registering, attended, stayed till the sales pitch, and so on. You can then customize your automated follow up email campaigns based on how far they got into the webinar!

Video Storage

For video storage the big three are Wistia, Vimeo, and Youtube. Most online tools out there will allow you to embed videos from one of these three locations.

We prefer Vimeo as it has advanced data and tracking capabilities and after the video stops playing, you don’t see ads to other videos – sometimes of your competitors!

If you are just getting started, you can use Youtube and set the videos to private so they are only seen on the pages you have them embedded.

Another option is also self-hosting your videos on Amazon S3. We do this for our church videos and then embed them on our site since we have so many! This is actually the cheapest option but requires a little bit of technical support to set up. 

Have you ever seen how some people have it where after 3 days, the sales page automatically changes to a closed page? There are a couple of ways to do this.

If you have Infusionsoft, what you can do is instead of linking directly to the sales page from your email campaigns, you can use a custom field to insert the link to the sales page. Then after a certain number of days, change the link in the custom field to point to the closed waitlist page. Once this is done, even if the contact goes to a previous email, they will still see the closed sales page. 

Another way to do this is using a tool called: Deadline Funnel. I don’t prefer this method because it breaks if the contact does not have a “cookie” on their device which can happen if they sign up for the information with one device, but later choose to click from an email to the sales page from a different device. Since no “cookie” is present, it shows the sales page as closed even though the email they just received says they have 2 days left to purchase for example! 

The way it works is to set it up to automatically display a different url (usually the waitlist page) after a certain amount of time. There is a timer that displays at the top of the page letting people know how much time they have left to purchase.  Once set up, anyone that visits the site for the first time, will have a certain amount of time to purchase before the sales page closes down.

Note: Most of the time when launches are done, the pages are closed manually by someone staying up till midnight on the night of the launch (or doing it first thing in the morning!)

Over the years, we’ve used a lot of appointment scheduling tools. The one I like best and we use now is Acuity Scheduler. Accuity works really well if you have a team of coaches that you need to set up with personal calendar links for your students as well!

Some Appointment Tools are:

Sometimes you will need to connect two tools together that do not have a direct integration. To do this we usually use Zapier or PlusThis (for Infusionsoft). 

Zapier is a connector. It basically saves you the cost of hiring an API developer to build and maintain custom code to connect two online tools. 

Recommended Tech Stack…

As you can see, the cost of running an online business can quickly add up and there are a lot of choices to make. 

Here is my recommended tech stack for getting started that still allows you to have enough flexibility for growth:

Domain Registration

GoDaddy

Hosting

LiquidWeb

Website

WordPress with Elementor

Email

GSuite

CRM/Shopping Cart/Marketing Automation

Infusionsoft

Membership Site

Memberium + LearnDash

Landing Page Builder

LeadPages

Merchant Account

Bank + Authorize.Net (Cart Not Present)

Appointment Scheduler

Acuity Scheduler

Video Storage

Amazon S3

There you have it! So what does your tech stack look like?

How to identify spambots and kill them like the cockroaches they are

Recently the Infusionsoft community was disrupted by a spambot attack that put every single Infusionsoft user at risk of not having their emails delivered to their customers, to their prospects, or to any of the contacts in their database for that matter.

One of the benefits of using a hosted email provider such as Infusionsoft is that there should in theory be an increase in email deliverability. By email deliverability I mean – your emails get to the inboxes of your contacts. Guaranteed.

Remember the good ole’ days when the mailman had his route to hand deliver your mail to your mailbox. Wasn’t that much more direct? The post office had a saying:

quote

That’s kind of like what we’re saying about email deliverability. No matter what, if you use our service we are going to make sure we have the right equipment and the right people to get the job done.

There are times when there is a disruption in service. Those times are usually under extreme circumstances such as natural disasters such as floods or fires. For example this past weekend, there was a an internet flood.

What happened was this

Over the last few months (or years) spambots have been quietly exploiting a vulnerability in the Infusionsoft webforms. They did not come in masses of thousands or tens of thousands – because that is something we would have noticed. They also did not come dressed as spambots – they made sure to cover their tracks by slipping into our databases quietly in small groups of 20-30 always making sure to have a few real and legitimate contacts with them so as not to be noticed.

spam-bot2These spam bots were actually quite smart – though not that smart as we will see in a moment.

These spam bots didn’t just enter through the front door of an Infusionsoft web form – they also made sure they got into the daily operations of top Internet Marketers by automatically clicking and confirming the email addresses used.

What that means is that even when you as the Infusionsoft user is doing everything you can do to prevent sending out emails to spambots by requiring all of your contacts to double opt-in – all of your efforts are undermined with the wicked plot of the spambots.

How were these spambots identified you ask? Well, in this case they all came in on the same IP address – making it drop dead easy to identify them. (Amateur hour move spambots!)

Which leads us to this. What can you, an ethical Internet Marketer, do to identify and kill the spambots like the cockroaches they are?

How to Identify Spambots

If your site normally gets less than a hundred opt-ins a month, the process can be quite simple. You can use custom notifications from Infusionsoft to be notified every time someone opts-in to one of your forms.

infusionsoft1

Set up a special filter for these notifications in your email inbox and each day check how many come in. Spot check them for spammy looking email addresses. The whole process should take a few minutes a day. Not ideal – but easy to implement and low cost for most business owners.

If your site normally gets a few hundred to up to a thousand opt-ins a month, the process is more difficult to identify. You will want to set-up checks to monitor:

  • Spikes in Confirmation Rates
  • Spikes in Links Clicked in Emails
  • Decrease in Conversion Rate of your Email Marketing Funnel

Measuring spikes in confirmation rates or links clicked is quite easy to do with tools such as Graphly.

You can use the automation links to apply a tag anytime someone confirms their email and set-up a report in Graphly to measure how many contacts get the tag applied over time.

graphly-tags-applied

Measuring a decrease in conversion rate is a little more difficult if you are not already measuring the conversion rate of your email marketing funnels! (We will save how to set up that tracking for another day!)

Suffice it to say, if you have a decrease in conversion rate, one of the first things to check is the source of your traffic.  Export all of the contacts that entered your email marketing funnel over the time period of the drop and look at the emails. You should see a pattern. You should be able to quickly identify contacts that you suspect are spambots. Once you do this, you can check their history on their individual contact records to confirm your suspicions.  If you are applying link clicked tags on all of the links in your emails (which you should be doing), you should quickly see that these contacts not only opened every single email, they also clicked on every single email. Jackpot!

Once you have verified that several of the emails are actually spambots you will notice patterns. You will see that they have a common domain in common. They might all be opting into the same webform. They might all be opting in a few minutes apart from each other.

This does take work – but there is not an easy way around it that I know of.

Once you have identified the spambots you can safely delete them from your Infusionsoft app. Use the domain blocking functionality of Infusionsoft to block any obvious domains.

infusionsoft-spam-filter

How to Close the Door to Spambots

Now that you know how to identify the spambots – the next question is – but HOW can I stop them from ever entering in, in the first place?

I have found that by implementing two steps, the spambot issue is greatly reduced.

The first is by installing Cloudflare on your site.

  • Enable the Web Application Firewall

web-appliction-firewall

The second is by installing the Wordfence plug-in.

  • Use Rate Limiting Rules to throttle or block excess pageviews

rate-limiting-rules

Since I installed both of these on my sites I have not had any issues with spambots. (Not to say that I never will or this is the permanent fix!)

Another option (though not a reasonable option for most) is to create custom opt-in forms that add the contact info to the Infusionsoft database via the API and bypass the Infusionsoft webforms.

One of the reasons this issue happened in the first place was due to a vulnerability in the Infusionsoft webforms – a vulnerability they have tightened up by blocking the offending IP so that no spambots can enter through that IP again.  This is great and exactly what should have happened but it will only be so long before the spambots find another door to enter.

Do you have questions on how to implement? Want help installing and configuring Cloudflare or Wordfence? Would you like my team to audit your app or set up a system so you can monitor your app to prevent this from happening to you? Please click here to schedule a free strategy session

3 Recent Facebook Changes That Affect Your Business Page

On April 21, 2015, Facebook announced that they were making three changes to their algorithm. The changes were based on a survey that asked Facebook users what they would like to improve about their personal page feed.

As you might already know, on Facebook only personal page likes count on a business page. (That’s why you always see, “Like us from your personal page” in most business posts.) So, while Facebook might have been targeting an improved experience for personal pages, our business pages are going to take a hit, too.

Here are the changes that Facebook has announced and how I think they’ll affect our business pages:

facebook-thinking

#1 Users will see less “commented on” posts in their Facebook feed.

Previously, the Facebook feed would show us the posts that our friends were commenting on. At the top of the message, it would say, “Jane Doe commented on Earth Friendly Farms post” and show us the entire thread of comments.

Facebook is going to move these posts down the page. If you want to see what your friends are up to, you’ll need to spend more time scrolling to the bottom of your newsfeed.

How does this apply to your business page? This change will keep your friends’ friends (or page likers) from seeing who’s engaging with your business. It will make it more difficult to get new likes from the friends of the people who like your page, as well.


#2 Facebook is relaxing the “multiple posts” rule so that users see more content.

Facebook is labeling this as an effort to improve “the experience for people who don’t have a lot of content available to see.” If you are only connected with a handful of friends, you’ll now be able to view more of their posts.

How does this apply to your business page? Anyone that likes your page but only has a small group of friends should now be seeing more of your business content.

Be aware, however, that if you publish several times a day on your business page you might end up overwhelming the newsfeeds of people with a low friend count. They could unfollow (or unlike) your page.

When too many people select “I don’t want to see this content” from the dropdown box you’ll be penalized by the Facebook algorithm.


#3 Individual user behavior will dictate what Facebook users see in their newsfeed.

The survey was very clear about one fact: Facebook users did not want to miss important updates from their friends. Now, they will be deciding on what you see based on which users you engage with the most.

How will this affect your business? If your business followers have their algorithm set to Top Stories (instead of Most Recent), there’s very little you can do to have your business content come up first in their feed.

In essence, they have to like you and share your content to see what your business posts, but if they don’t see what you post (due to the Facebook algorithm), they can’t like you. And this catch-22 isn’t going to improve anytime soon.

How can you really control the Facebook updates on your business page?

Of course, every time Facebook makes changes to their algorithm there’s going to be an adjustment period. We all have to learn how to play the game all over again. Here are a few tips I’ve had personal success with:

  • Stop posting photos and links on your business page
    Facebook is providing more page views to text only posts. Feel free to hashtag your entries to help people find you.
  • Get people to engage with your business page
    Like always, engagement is key. Strive to have users share your content, but liking and commenting are still better than nothing.
  • Share content from your business page to your personal page
    Facebook does not seem to have altered this very simple trick; go onto your business page and share the content onto your personal page.
  • Tag people in your posts to encourage engagement
    One of the best tips may be to let others know when you’re posting their articles. Social authority goes a long way; by sharing your post, they look good to their audience.

Still struggling to figure out Facebook? Our team of experts can help.

Click here to subscribe to my mailing list and schedule a free consultation!

9 Website Design Tips for Building an Authority Site

The most important aspect of an authority website is the content. Therefore, you want to put the content front and center. The best web design for an authority site is a blog focused design or a magazine design where the content takes center stage. The best way to build a website like this is to use self-hosted WordPress as your platform. There are many free and premium WordPress themes that you can use for your authority site. But whatever platform you use, it’s important to follow basic website design rules.

website design tips

1. Visually Pleasing 

Using images, whitespace, colors and space in a visually pleasing manner means you need to understand how web design is different from designing something for print. People read the web differently than they read a book or a magazine. Understand how people scan websites, compared to how they read magazines and you’ll do a better job creating a visually pleasing website.

2. Easy Navigation 

Don’t try to be clever with the names of links. Give links the names they should have such as Signup, Contact, Subscribe and so forth. People know what these words mean, don’t create a new word just because you want to be different. Instead you’ll create confusion.

avoid-spam

3. Fast Loading

No one is going to wait 5 minutes for your site to load. You’ll be lucky if they want 30 seconds. Creating a fast loading site is essential to your success with an authority site. You want readers to be able to get to your content without any frustration.

4. Responsive Design 

Today, with more people purchasing smartphone technology than personal computers it’s imperative that your website be designed so that it’s responsive to the type of devices being used to access the information. When determining your target market, find out how they typically access the web.

5. Unobtrusive Signup Forms & Ads

Don’t put a bunch of popup and flashy, intrusive sign up forms and ads that will frustrate your readers. If you do use pop-ups or pop-unders use well-made designs that are easy to close so readers can get to the content.

6. Up Front & Center Features

If you want your readers to do something make it simple; put it up front and center. If your goal is to get readers to sign up for your newsletter, make it clear by putting the sign up form above the fold, and ask them to sign up. Tell them how; give them the steps in a clear manner.

7. Useful Content in Many Forms

Avoid promotional writing, and focus on creating informational content in text, video, imagery, and all the forms that you can. Some people enjoy reading short blog posts, some will enjoy getting deeper and reading a white paper, others will love watching your step-by-step video tutorials. Give them everything. Repurpose each piece of content into several forms for best results.

8. Don’t Reinvent the Wheel

It can be tempting to make a totally different web design to be different but it’s better to stick with current convention than to make a site so different that users are confused. Your readers have expectations that a website will look and behave like a website, don’t scare them off by making your site too different.


9. Test Everything Always

test website designAnytime you add a new feature to your website it’s imperative that you test it to ensure that it works right. Get someone else to test it out, to make sure they understand how to get around your site without you leading them. Testing it yourself never works well because you understand what you did; get someone who has never seen it to test it.

Designing a website that works well as an authority site isn’t much different from designing any website except that in the case of an authority site the content is the main thing, so you want the content to be front and center. A blog type design works very well for an authority site, and self-hosted WordPress works very well for this type of website. Once you understand the fundamentals of effective website design, you’ll need to think about how to choose a niche.

How to Get Better Results with LeadPages


LeadPages offers a simple way to create a multitude of different types of landing pages without understanding of any sort of code. But, to make it work harder for you, it’s imperative that you understand how to use it best to get the results you want.

Get Prepared

Understand in advance what type of money making page that you want. You have a lot of choices such as:

  • Sales Pages — A page, sometimes called a landing page, that is on the website for the purposes of convincing the reader to purchase the item discussed.
  • Opt-in Pages — This is a page, or email created for the purpose of convincing the audience to give you permission to market to them in other ways. This usually occurs for a newsletter, coupons, free give away, or email list.
  • Webinar Pages — You can use a regular sales page for a webinar page, but why should you when you can have a special page meant for webinars that will have a higher conversion rate that is also integrated with the webinar service.
  • Thank You Pages — Some people are doing away with thank you pages, to their peril. A thank you page is an excellent way to create more interest in other products and services as well as a way to ingratiate you to your audience.
  • Upsell Pages — When your customer has made a purchase, it’s the right time to offer them additional and complementary products and services. Sometimes an upsell is during checkout, sometimes on the Thank You Page and sometimes it’s a separate page all together.
  • Launch Pages — Are in the process of creating a valuable website or community? Then you want a way to capture interest while you’re still building. Creating a launch page that counts down the days to launch and captures email addresses is a great use of this space.
  • Pre-Cart Pages — This is a page that you can display to your readers once they have clicked through to purchase, right before the check out process. Often it’s where your disclaimers go as well as other information your reader is required to click before proceeding to buy.
  • Social Media Squeeze Pages — A squeeze page helps you better analyze your social traffic and gather information from your visitors so that you can follow up with them.
  • 404 Error Pages — Error pages are an often under used way to capture more leads, redirect traffic to make more sales, and to delight and surprise your visitors. By personalizing error pages, you’ll take advantage of unused space to create a higher return on investment.
  • Coming soon Pages  — If you’re in the process of creating a page but you don’t have a launch date yet, you can create an effective coming soon page that will capture leads and / or redirect them to a finished product.
  • Domain For Sale Pages — Want to sell your domains? Create a for sale page that captures information so that you can send them information about buying the domain name.
  • and More… There are so many ways you can use LeadPages to make your websites, social media, blogs and email marketing more effective that it’s hard to list it all in one report.

All of these choices still require you to be prepared with certain information to edit the pages and get them ready for publishing. Choose what you want your page to promote and then work from there.

In various cases you’ll need all or some of the following:

  • Images — As they say pictures are worth a thousand words. Be sure to choose images that enhance what the copy is telling the reader and does not distract or distance the reader from your words.
  • Sales Copy — You’ll need keywords, headlines, and sales copy for different areas of the pages that you create. Try looking at the template in advance, then making notes of what you’ll need.
  • Video — In some cases, depending upon the template you use, you may want to include a video. Look at the parameters of the space saver on the template and start from there.
  • Testimonials — The very best way to sell something is to allow other people to share their stories on how the product or service worked for them.

Collect Appropriate Information

Just click on any template that you like and look at the various elements it includes. Remember, you can hide different elements if you wish and delete them, or include them. If you choose to include them, you’ll need to go through the template and click on each element. Write down a list of what you need as well as the details such as:

  • 1 background image 1440×1100 pixels
  • 1 Headline
  • 1 Main Image 436×251 pixels
  • 1 Form Headline
  • 1 Main Text for front page about 15 to 25 words long.
  • 1 Call To Action
  • and so forth…

Just click on each element and look on the left side for the information that you need. For example for the following launch page:

17launch page example

First click “Use this template” then just click through the various elements to see what size the images are and so forth. All the elements on the page are also listed in the menu to your left under General Parameters and Page Content.

Under Page Content if you click on Background Image it will show you a section where you can replace the background image.

18getting prepared

It shows you what is currently the image, a place to upload a different image, and it explains the best size for the image. Write down the information you find under each element. Once you’ve completed your list you can now create the components you need to edit the template. You can create the components yourself or send them off to various contractors such as a graphic designer, copywriter, and virtual assistant.

Begin Editing

Once you’ve prepared yourself for all that needs to be included in the edit, you’ll be able to get the editing process done in about an hour for each longer sales page, and less time for shorter launch pages which can be edited in a matter of minutes. You can let your VA do this process too if you’ve put things in a good order so that he or she is simply cutting and pasting the information to the correct boxes.

Now that you understand more about “money pages” and you know about LeadPages and what it can do for you and how to get started there is no excuse or reason in your way to not begin. Make a list of all the different “money pages” that you can make with LeadPages for your products and services that you currently have.

How to Secure More Opt-ins with LeadPages


LeadPages

A sales page, sometimes called a landing page, name capture page, launch page, squeeze page or registration page is a way to highlight one particular product, service, event or opportunity designed to sell a product, service or to simply collect leads. These are known as the “money pages” of your website.

Money pages usually have a “buy now”, “apply now”, “download now” or “register now” or some other “act now” button on the page. These are known as money pages because they are very lucrative ways to increase lead capturing as well as sales.

There are several important elements of a successful sales page that you should include.

  • Attention Grabbing Headlines — When you consider that headlines are read more than the rest of the copy on your page, they are very important. You should create headlines that are unique, specific, urgent and useful. The words and position of your headline are paramount in increasing conversions.
  • An Opening Promise — You have merely seconds to grab the reader’s attention so it’s important to start off with a promise that catches their attention and imagination. Don’t be boring, long winded, or give away the farm. You want them to be compelled to read more.
  • The Story You Want to Share — Your story is also why people will want to keep reading and why they will want to opt in or buy what you’re selling. If you can weave a story that keeps the reader interested and tells the true story of why you’re making this offer to the audience you’ll have a winning money page.
  • Words That Foster Credibility & Builds Rapport — As you are writing your sales page, include words and details that make the reader feel as if they know you, and that they like you, and trust you.  If you know your audience well enough, you should know what to say and what words to use that let’s them inside your world a little.
  • Subheadings That Redirect — People lose attention quickly. It’s important to include sub headlines to help bring them back into reading the copy. Most people who read online scan from top to bottom instead of left to right as with printed information. Keep that in mind as you build your sales page.
  • Relevant Images — People are visual by nature, so you want to include some imagery. However, don’t let images take over the sales page, but choose images that enhance what you’re trying to convey.
  • Testimonials — By including testimonials you can quell the fears of buyers. This is especially true if you can link to a real person in the testimonial so that the reader can verify the information if they choose to.
  • Solid Proof of Performance — This can be accomplished with testimonials as well as your own story about how the product or service worked for you. Include details about why you came up with the product or service and how it helped you and others.
  • Your Offer — Remember that you are selling solutions, not features, and you want your offer to convey the benefits of buying to the reader. You also want to make the offer so good, that it’s hard for them to refuse.
  • Risk Eliminating Language — Many people do not buy based on fear. The more you can reduce their risks the better. Include risk eliminating language such as “no questions asked, money back guarantee” so that all the risk is yours and not theirs.
  • A Strong Call to Action — Before including your “buy now” or other call to action button, be sure to remind your audience about the benefits of your product or service. Let them know that they have a chance to change their lives by clicking.
  • Responsive Design — This means that no matter which browser or device is used to view your landing pages, they work. Nothing can be worse than clicking an exciting headline and finding that you cannot read it or act now because the page is not optimized for mobile.

You can also add video to your sales pages. A great place to do that is in the testimonials area, or perhaps include a how to video to highlight and demonstrate how the product or service works. Video enhances the sales page by making it more interactive, creating a way to explain in pictures and words the benefits of your product and / or service to the reader.

All that sounds like a lot of work doesn’t it?

Don’t worry. It’s not that hard these days. With software like LeadPages you can have your new money making pages made in less than hour, assuming you already have your images created, testimonials collected, and story ready to tell. Take a look at the list above and ensure that you are ready so you can get your sales pages made fast.

LeadPages can make your life a lot easier and more profitable, because it is designed to lead you through the process of creating many different types of “money pages” quickly and easily having them live in no time at all. They do all the work of figuring out what types of pages work best, all you really have to do is fill in the blanks with your own ideas, products, and services.

What is LeadPages?

LeadPages is a cloud-based software as service, that allows you to quickly and easily create “money pages” that you can use in a variety of different ways, integrating with many other marketing software such as Aweber, Ontraport, Facebook, WordPress and more. LeadPages offers many templates (currently about 50) designed to get results. These are generally templates that have already proved successful for others.

What Does LeadPages Do?

LeadPages helps you create functional, responsive, usable landing pages quickly and effortlessly through a variety of template choices. You just choose the template you want, and then edit it to fit your product and / or service and you’re done. You can download the HTML version or integrate it with WordPress or Facebook. You can also use the link that LeadPages offers instead.

What Are The Benefits of LeadPages?

They’ve already done the research and know what layouts work best and get the highest conversions. It’s fast to use, and easy to understand. It also integrates with other products very well such as social media, webinar, and autoresponder software. You just fill in the blanks, more or less, on the template to craft a landing page that gets results.

Who Can Use LeadPages?

Anyone who wants to increase their opt in rates, sales, and improve conversions should use LeadPages. If you’re running any type of marketing campaign for yourself or a client, you’ll enjoy using LeadPages to get the most out of your offers. You won’t have to come up with the design or layout on your own. There is no point in reinventing the wheel when it already works so well.

Overview of LeadPages

In under an hour, you can build opt in forms, squeeze pages, sales pages, social media pages, webinar promotion pages, optimized 404 pages, video pages, thank you pages, launch pages, upsell pages, pop ups and exit pop ups and much more.

LeadPages has many different templates available. Once you’ve created your account, you can get started right away.

The first thing you’ll see after you create your account and sign in is a top menu that looks like this:

1TopTool Bar


Templates — If you click Templates you’ll be taken to the entire list of available templates.

LeadPages™ — Clicking here will show you any pages you’ve created with the option to also create an A/B split test page.

LeadBoxes™ — This is a neat feature that allows you to make just a small box to capture leads instead of an entire page.

LeadLinks™ — Available only to pro customers, you can use this to improve your conversations for people who have already opted in to your list, by this way sign up for things via an email link without other steps.

Support —  If you click support, a window will pop up allowing you to ask a question. Type in your question and then a variety of responses will be given, and if those don’t work you can click “none of these are helpful — get in touch”.

My Account — If you click on this you’ll bring up another menu that looks like this:

2my account

From there, you can upgrade your account, add integrations with your email autoresponder software, shopping cart software, webinar software or others.

This will unleash more functionality for you. You can also use features they are trying out in Beta such as the current Lead Magnet Delivery feature which allows you to upload a file that your leads will be promoted to download. This is also where you will store your images, change “powered by” settings, and more.

The left tool bar is also present. It looks like this:

3left tool bar

This is just a way to access each type of template more quickly. So, if you want to create a Sales Page, for instance, you would click on Sales Pages to view the many different choices of layouts. Once you choose the template you like, you can get started; which is exactly what this demonstration will show.

Choose Sales Pages

4choose sales pages

As you can see you can now choose to use the Template featured, or you can scroll down and look at the many other choices such as Google + Hangout Pages, Super Simple Sales Pages, eBook Landing Page, Long form Sales Page with Video and so forth. You can also sort by conversion rates to see which one converts best.

We are going to choose the eBook Landing Page:

5ebook landing page

Simply move your mouse over the choice and an image will appear that says: Use This Template — click it.

You can also choose to watch a tutorial instead of clicking it right away. The tutorials offered by the LeadPages team are really useful if you feel lost. But, it’s so easy to use that more than likely you will not need them for most features.

Once you click through you’ll be taken the page that enables you to edit the template easily.­

6ebook template landing page

Above this window is a tool bar that looks like this :

7landing page editing tool bar

To the left are many choices about the parameters and page content. This is a small sampling of the choices that go down the left side of the page.

8page content menu items

To edit each part just click on that area to the left, or directly on the area right on the template.

For instance, when you click on the book, a screen appears to the left like this:

9edit book cover

As you can see, you can make the image disappear or change it. This is how it works for every aspect of the page, just click where you want to edit, the ability to edit pops up on the left side of the page, then make the changes you want whether it’s your logo, the text on the page, a menu item, or something else.

Click the area, and then use the editing area to change. For example, you can click on Opinions

10menu bar editing

which will bring a window up on the left like this:

11opinions menu item

Notice that you can change the word “Opinions” to something else by just typing in the box.

Perhaps we want to change it to Testimonials. Simply type in the word you want in the box, then click Okay. Now the top menu under your logo has changed to the word you want.

12changing menu item words

You can proceed with the entire sales page by clicking and changing the words, and the images until you are done and have an entirely unique page. As you click on each area to edit, you’ll quickly create a landing page that works for your needs and is unique to your audience.

For best results, try to replace images shown with images that are the same size. You can find out the size of any image is by right clicking on it, downloading it and checking the size in a graphics program or by using a plugin like Firebug for your browser. In addition, LeadPages tells you in the left side of the menu the recommended size.

14recommended size


Once you know the sizes just have your graphic designer make them the size you need. Always click “OKAY”.  When you’re done simply click Save. Then you’ll notice a new feature shows up in the tool bar called analytics.

15editing tool bar after save

  • A/B Testing –If you have a Pro Account you’ll be able to take advantage of the A/B testing features as well. A/B testing is a good way to determine which sales pages work best for your particular audience. Usually you’ll change just one element be it layout or words used and then use both sales pages at the same time and see which one converts best.
  • Analytics — From here you also set up your analytics. Just click Analytics on the top menu bar. Pick a date to get started and you can see how many views or unique views your page has received during a specific time period. Finally, when you’re ready you can publish your new page.
  • Preview — Once you’ve saved you can preview what your page looks like prior to publishing it.
  • Save — You must save before publishing or previewing. If you forget it will prompt you to do it.
  • Publishing — In order for the publish feature to work you’ll have had to set up all the General Parameters. This includes integrating with WordPress, Facebook, Autoresponders or other software.

In addition, you should also set up SEO, tracking codes, style settings, dynamic controls like share buttons, messages that appear with shares and more. You can also set up an exit pop up or redirect from here. In addition, you can help LeadPages with collecting statistics by choosing which industry your niche is in.

Once you click publish, LeadPages assigns a URL to your new page to redirect your audience to. Conversely you can also publish to WordPress directly using a WordPress plugin.

16how to publish

To get the plugin follow the instructions regarding which browser to use. Once you have the plugins for WordPress it’s super simple to publish LeadPages whenever you want.  As you can see, using LeadPages makes the process of creating all your “money pages” much easier and less labor intensive.

You can even choose to download the new page to your computer in HTML format to upload to your own server. There are no restrictions on how you use LeadPages to create. You could actually use LeadPages to create an entire website, although you really don’t need to do that.

Most of the thought to layout and design has already been done by the experts, and only converting designs are used. You can be assured that your LeadPages will get conversions if you send the right traffic to it.

6 Methods to Become a Successful Affiliate Blogger

By following the tips and advice in this article, you’ll be ahead of the game and on your way to becoming a successful affiliate.  Remember to provide quality content and information and once you do that you can concentrate on making product recommendations.  As your business grows, you’ll find other tips and strategies which work best for you and you can start experimenting a little more.

local-marketing-success

Here are the 6 steps:

    1. Make the affiliate programs that you select really relevant to your niche subject to keep the credibility of your site and entice your members into purchasing the products they need.  It goes without saying, but if you have a site about babies and parenting babies, it’s not a good idea to promote pet related products as these aren’t relevant to your target market.
    2. Set up your own domain or blog.  You can’t do this for every affiliate program, but if you find a product which has really helped you and offers a generous commission, you can set up a blog and speak about your experience using this product.  Make regular posts and comments about how the product is helping you and your experiences with it and link to the product throughout your blog.  You can also set up your own domain name to promote a product.  This looks much more professional than an affiliate link and will be easier to remember too.  It’s great for using when writing articles and content as well.
    3. Try to find affiliate programs that offer ‘lifetime cookies’ or ‘lifetime customers’.  This means that when you send a member to the affiliate site your affiliate link is tracked in their system and even if the member doesn’t purchase the product right away, you’ll still get paid if the person returns and buys from that affiliate program at a later date.
    4. Write honest product reviews.  Write informative and honest product reviews.  This is a great way to give your unbiased opinion on a product and to build trust with your subscribers.  And if a product is faulty in some way you can add that as a note, your subscribers will trust you more if they know your recommendations are honest and sincere.
    5. Find the correct placement for affiliate links.  As mentioned above, affiliate banners and graphics don’t usually work as well as providing informative content and weaving affiliate links where appropriate throughout that content.  For example, you can write a quality article about helping your baby recover from colic and in that article you can link out to resources which will help the parents remedy this problem.
    6. Redirect your affiliate links through your own domain.  There are many benefits to redirecting your affiliate links.  It’s easier to track and remember your links when you need them.  If a program changes their links it’s easy to go back and change your links.  You’ll also present a more professional image; many affiliate links are long and look like garbly goop; your visitors may be suspicious of these links.  Redirecting your affiliate links solves all these problems.

How to Promote Others and Make Money Out of It

affiliate management

Affiliate marketing is a great way to make money online. If you’re just getting started this is a good way to get your “feet wet” in the online business world without having to create your own products or services. If you’re an experienced marketer, affiliate marketing can add a nice amount of extra income to your business.

This report will help you get started in affiliate marketing and maximize your sales for super affiliate status.

What is a super affiliate?

A super affiliate is an affiliate who takes affiliate marketing seriously and doesn’t simply throw up a bunch of banners or ads on their site (these don’t really work too well). A super affiliate will take the time to review a product, write a comprehensive product review, and even set up a separate domain to promote a specific product. A super affiliate also knows the importance of building their list so they can further promote products to their customer base.

How does affiliate marketing work?

Simply, you sell other people’s products on your websites and blogs. When you see a product you would like to promote, you can sign up for the affiliate program and start promoting that product on your website. As an affiliate, you will receive your own unique ID which will track any sales sent from your site to the affiliate site.

A good affiliate program will also give you information on where and how you can track your sales, where your clicks are coming from and payment information.

You can find affiliate programs through networks like Commission Junction (CJ.com) or Clickbank.com. These networks act like “middle men” and take a certain percentage of every sale sold through them. You will also be paid directly through the network rather than from the vendor.

The plus with these types of programs is that you can choose as many programs as you’d like all in one convenient place and payment is quite easy to track.

The downside is you don’t often get the same promotional tools or training that individual affiliate programs will offer you. Many individual affiliate programs (especially those related to information products) will also offer you higher commissions.

Here are a few places where you can find affiliate programs to promote:

www.CJ.com

www.Clickbank.com

www.Amazon.com

When you first get started in affiliate marketing, it can be a pretty daunting process. It can all look pretty confusing but by following a few simple rules you can get started and learn more as you go along.

50 Tips for Starting and Marketing a Membership Site

 marketing-strategy

  1. Use a CMS (content management system) – Don’t do it by hand, unless you are HTML proficient. Trying to manage a membership site by hand is incredibly difficult.
  2. Do your market research. Look for unsolved problems or sub-niches that nobody else is addressing. Don’t do a membership site that’s the same as another established site on the market.
  3. Have a launch budget. It’s easy to accidentally spend way more money than you planned to if you don’t budget carefully.
  4. Do a test buy with a real credit card. Make sure your shopping cart is properly integrated with your membership site software.

shopping-cart

  1. Try buying banner ads on related websites. Look for sites that your target market would browse and post ads on them.
  2. Have a SEOed site that feeds into your membership site. Most membership sites block their content from search engines, so make sure you do have a content based site that search engines can see.
  3. Get someone on Odesk to configure a WordPress multi-site for you or consider using a plugin like ManageWP. If you’re using WordPress and you own multiple sites, a multisite will allow you to control all your sites from one control panel.

 2-multi-site-dashboard

  1. Try out PPC traffic. Once you have a few sales and have a proven funnel, use PPC traffic to drive new people to your sales page.
  2. Contact others in the industry to do JVs. Get them to promote your membership site.

 four

  1. Offer an affiliate program that pays out every month. Alternatively, you can offer an upfront payment for their subscription. For example, for a $40 a month membership program, you can pay out $100 upfront for that subscriber.
  2. Give a lot of free content away. Don’t make the mistake of thinking your best content has to be reserved only for your free membership site. Free content helps build credibility.
  3. Recycle old content for SEO. Any content that you don’t use anymore, put it up for free.
  4. Don’t sell your membership right upfront. Instead, collect an email and let people get to know you before asking them for their money.
  5. Split test different price points. Don’t just assume you know the best amount to charge.
  6. Don’t be attached to high prices. Sometimes you’ll make more with a $7 a month membership program than a $20 one, because so many more people will sign up.
  7. Split test different delivery models. For example, if you do audios, try a $40 a month subscription where you actually send them CDs, as well as a $15 a month program where they just download the MP3s.

slip-testing


  1. Avoid open archives. Don’t let existing members have access to all your old content, or people will just wait to sign up so they can get more content when they sign up.
  2. Followup, followup, followup. If you don’t make the sale the first time, keep adding value and keep asking for the sale.
  3. Sell your specific month’s content each month. If you’re doing a download this month about “The 5 Top Running Mistakes People Make,” then do an email blast talking about how harmful these problems are and talk up this month’s program. Often time’s people won’t necessarily want to be on your subscription in general, but might sign up just so they can get this month’s program – And end up staying on.
  4. Give them a free trial. This often helps enrolment.
  5. Package it with a product. If you sell a $47 product, why not throw in a month or two to your subscription for free? If they don’t cancel, they’ll get billed, but make sure this is very clear in your marketing materials.
  6. Have more than one front end product. The more products you have feeding into your membership program, the more members you’ll have.
  7. Make it seem like an off hand add-on. Try selling your program hard, as well as try just mentioning it very briefly at the end of the salesletter.
  8. Deliver incredible content. This is really the best way to keep people subscribed.
  9. Vary your content so people don’t get bored.
  10. Give an unexpected bonus around the 3 month mark. Many marketers see a sharp dropoff at the three month mark. Giving an unexpected bonus can help keep people who’re on the fence on your program. 

5-surprise-bonus

  1. Time monthly content with product launches. If you’re launching a product on “How to Increase Your Productivity,” this month’s content might be about “7 Productivity Tricks.” The buzz from your membership can help promote your launch.
  2. Do a content piece on a hot topic for your members.
  3. Use real world examples. People love hearing how people did things in the real world.
  4. Build your credibility through other avenues, like speaking and writing. This helps increase your conversions and your retention through increased name recognition. 

2-Speaking-Opportunities

  1. Have a higher end tier. Don’t just charge one price for your membership program.
  2. Think twice before starting a member forum. It’s very hard to populate a forum.
  3. Get it launched. Don’t spend ages getting it perfect. You can launch with just a simple autoresponder drip feed system. 

7-no-perfect

  1. Ask your customers for feedback. Ask them how you can improve the program, or what content they’d like you to offer.

 8-survey

  1. Launch with a good amount of content. People shouldn’t feel disappointed when they first see your member’s area.
  2. Your member area should be well designed. Just because it’s not part of your main site doesn’t mean you can skimp on design. Remember: Paying members can cancel any time.
  3. Promise small and over deliver, rather than over promise and under deliver.
  4. Have a few months of backup content. This helps prevent dropped balls and missed content dates.
  5. Stay ahead of your earliest member. If you have a member that’s been around for 1 years and 2 months, you better have autoresponder content for at least 1 year and 2 months.
  6. Get a top notch copywriter to write your salesletter. It makes a big difference.
  7. Include a welcome package. Give people a ton of value the moment they join your program
  8. Give them discounts on your other products. This increases the value of the membership, as well as helps sell other products.
  9. Test a sales video. They often out convert pure text salesletters. 

9-Video


  1. Have members only contests. This builds a lot of buzz and excitement.
  2. Give surprise bonuses and content as often as you can.
  3. Get people from your offline network on your membership program. Send anyone who expresses curiosity about it to your site.
  4. Consider getting your program on Clickbank. A lot of affiliates use Clickbank as a resource for finding affiliate programs to promote. 

affiliate_marketing 

  1. If you’re shipping CDs, make sure you get the CDs to fulfillment as early as possible. The time between getting them to audio and them being ready to shop can be longer than you think.
  2. Every once in a while, do something that focuses on you rather than your audience. For example, your background story or your personal thoughts and tips.
  3. Use a service like CloudFlare to ensure the uptime of your membership site. Among other features, CloudFlare will jump in anytime your site goes down to make sure your users can still access an archived version of your site. 

11-cloudflare

Make Money Blogging: How to Use Chitika

ads

Chitika is a contextual advertising network. It allows publishers to place ad units on their websites, where both image and text ads will be shown, sometimes at the same time.

Because Chitika often uses images next to text ads on the same page, click through rates and therefore earnings can sometimes be even higher than Google AdSense earnings.

Here’s how to sign up for and use a Chitika account.


Step 1: Click Publisher, Apply Now

Click on Publisher along the top. A drop down menu will appear. Click on “Apply now” to begin the application process.

 1-Click-Publisher

Step 2: Complete the Application

Complete the application, which is really just a simple log in form with your email address.

 2-Send-in-Application2

Once you’ve completed your application, you’ll need to confirm your email. Shortly thereafter you’ll receive an email telling you that your account has been approved.

Log in to your Chitika account with your new account to proceed.


Step 3: Click Ad Setup

Click ad setup to create your first ad.

 3-Ad-Setup

Step 4: Click Get Code

A preview of what a display unit looks like will appear. Click on Get Code to continue.

 4-Click-Get-Code

Step 5: Customize Your Ad Options

A number of options will appear on the left hand side of your screen, along with a preview on the right hand side of your screen.

5-Customize-Ad-Options

Your channel is an important setting to pay attention to. It’s basically a description. You can sort your channels later by channels, which will allow you to get more advanced reporting from the Chitika system.

Basically, the channel should be a factor you’re trying to test out. For example, “Left Sidebar” channel might be applied to all the ads you put in the left sidebar. Later, you can sort by the “Left Sidebar” channel to see how all the left sidebar ads did as a group.

The format determines the size and display method of the ad. Type rotates between the different types of ads, including mobile ads.

Fallback options are basically what the ad will do in the event that there is no advertiser for the traffic you’re getting. For example, if you’re getting traffic from Zimbabwe and nobody’s bidding on traffic from Zimbabwe, Fallback options will tell the system what to do.

The colors set the color scheme.


Step 6: Copy Code and Upload

The code will update in real time as you make changes to the options box. Copy and paste the code into your HTML editor and upload it to have the ad go live.

 6-Copy-and-Paste-Code

Your first ad is up and running! If you want to put more ads up, just repeat this simple process.


Step 6: Basic Reporting

Basic reporting is shown in the dashboard of the Reports tab.

7-Basic-Reporting

You’ll see your earnings and traffic stats all in one glance.


Step 7: Advanced Reporting

Click on Advanced Reports to access the advanced reporting options.

 8-Click-Advanced-Reports

In this screen, you’ll be able to sort your ads according to the channels that you assigned to them when you setup your ads.

You can also sort by date range and choose to view ads from specific days or time ranges, or even data all the way from the beginning of your account.

 9-Advanced-Reports

Once you’ve selected all your options, hit submit to view your custom report.

There you have it! That’s how to sign up for a Chitika account, setup a Chitika ad, view your statistics in a glance and get more advanced stats.